BJJ Grip Fighting: A Beginner's Guide for Gi and No-Gi | MiddleEasy
MiddleEasy · Alex Mendez · 2026-08-26T23:28:57+00:00 · nguồn gốc
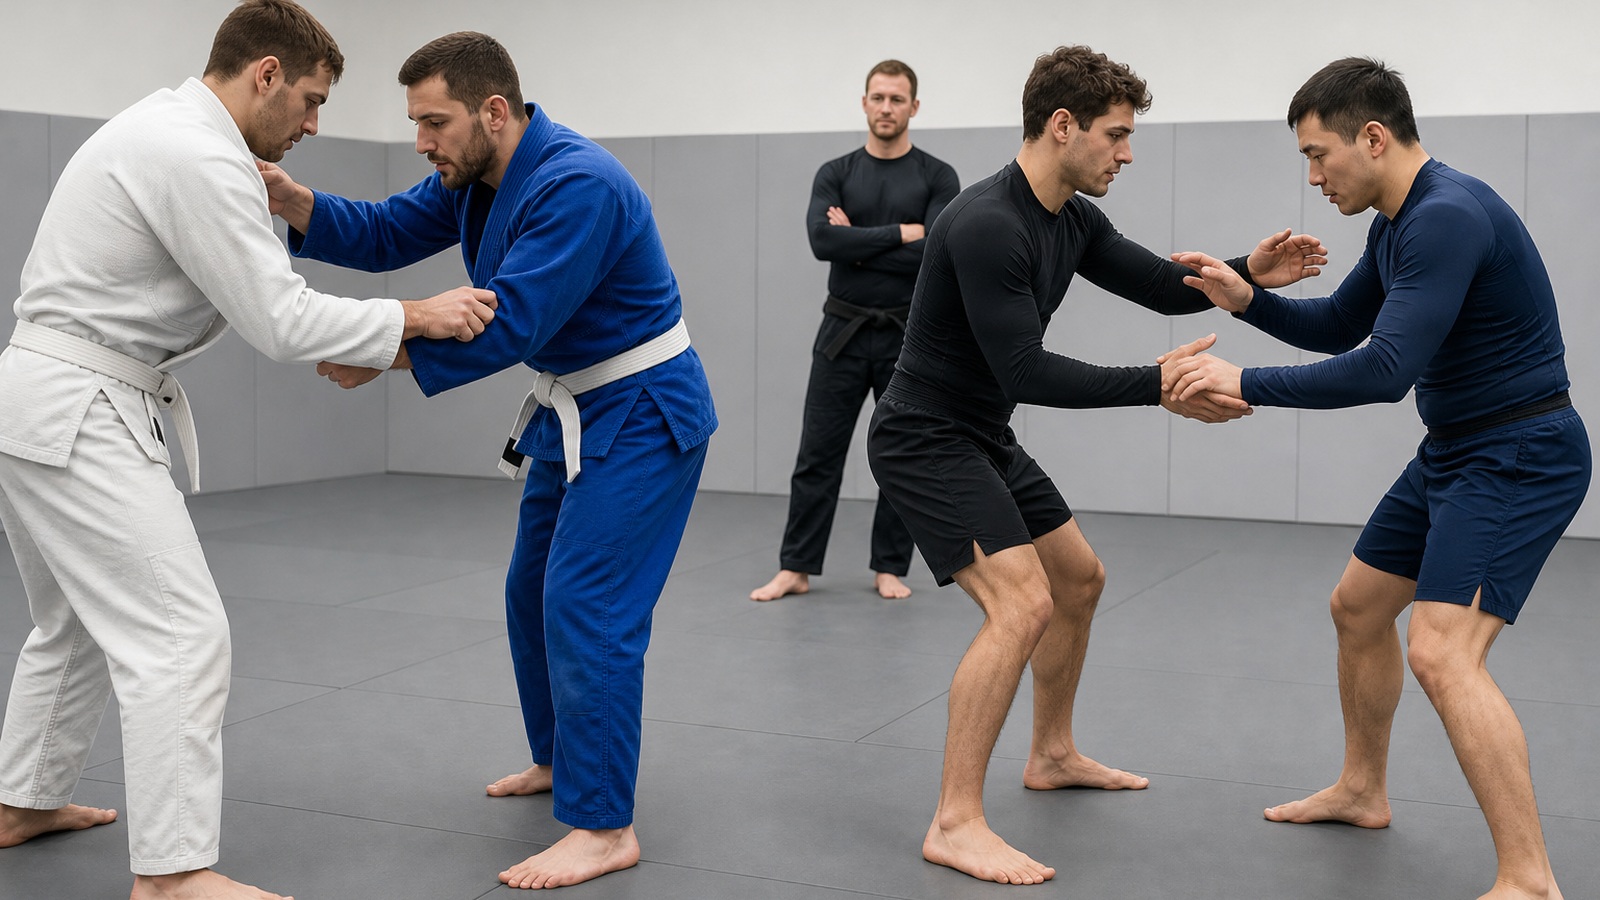
BJJ grip fighting is the contest for useful connection before the larger technique begins. In the gi, that connection may come from a collar, sleeve, lapel, belt, or pant leg. In no-gi, the same job is done through wrists, elbows, head position, underhooks, overhooks, and two-on-one control. The material changes, but the beginner’s process stays recognizable: deny easy access, establish a connection that affects posture or distance, move the feet and hips behind it, then replace the connection when the position changes.
The goal is not to squeeze harder than your partner. A useful grip should help you stand safely, stop a pass, begin a pass, expose an angle, or reach the next stable position. A grip that burns the forearms without changing anything is usually an anchor with no destination.
This guide serves new gi and no-gi students. It explains priorities and supervised practice rather than promising a universal grip for every body type or ruleset. Exact breaks, takedowns, submissions, and high-resistance rounds belong with a qualified coach who can correct the position in real time.
A grip should solve a positional problem
Before holding any cloth or limb, identify the job. Are you trying to protect your posture, pull the opponent out of posture, keep a passer away from your hips, connect to a leg, or stop someone from turning the corner? The answer tells you whether the current grip is useful.
Run four checks in order:
- Purpose: name the position or reaction the connection should create.
- Alignment: place your wrist, elbow, shoulder, head, and stance behind the grip instead of isolating one hand.
- Movement: move your feet or hips so the grip changes angle, balance, or distance.
- Destination: know when to release and connect somewhere more useful.
This keeps grip fighting connected to MiddleEasy’s BJJ positional roadmap. Hands create access; the position still determines what both players need next.
| Grip-fighting job | Common gi connection | Common no-gi connection |
|---|---|---|
| Manage upper-body distance | Collar and sleeve | Wrist and inside biceps control |
| Control one arm with two hands | Two-on-one sleeve control | Two-on-one wrist-and-elbow control |
| Win inside space | Collar, sleeve, or lapel connection with inside elbow position | Underhook, inside tie, or elbow control |
| Connect to the lower body | Outside pant grip where rules allow | Ankle, heel, or knee-line control taught for the position |
| Slow a turn or back exposure | Belt or back-of-collar connection | Seatbelt-style upper-body connection or hip control |
These are categories, not automatic instructions. The same collar grip can manage distance from guard, disturb posture while standing, or become useless after an opponent changes the angle. Learn the connection beside its purpose.
Start by denying the opponent’s preferred connection
Beginners often reach with both hands at once and give away posture. A safer first layer is defensive: keep elbows connected, hands available, head over the stance, and enough distance to see the opponent’s first reach. You do not need to swat every hand. Protect the route that would control your head, separate an elbow, or attach to the hip line.
If the opponent establishes a meaningful grip first, clear or neutralize it before launching an unrelated attack. Advancing through a collar-and-sleeve grip, firm wrist control, or dominant underhook usually lets the other player steer the exchange. Clearing first is not passive; it removes the handle that powers the next action.
Standing engagement needs feet behind the hands
From standing, a long reach can pull your head ahead of the knees and narrow the base. Move into range with a balanced stance, make one safe connection, and let the feet follow. If the hands pull one direction while the feet remain planted, the upper body twists and the grip becomes an arm-strength contest.
Use a simple beginner sequence: protect your lead side, establish one connection, gain a second point only when posture remains stable, then move to an angle your coach has assigned. Do not add throws to a grip-only drill. Uncontrolled falling changes a low-risk hand battle into a takedown round.
Guard grips manage the path to your hips
From guard, the bottom player uses connections to manage the passer’s posture and the space around the legs. A sleeve or wrist grip can stop a post or redirect a hand; a collar or head-and-arm connection can affect upper-body distance; lower-body control can keep the passer from freely circling. The useful question is whether your grips keep meaningful barriers between the passer and your hips.
Do not hold a failing grip after the passer has changed sides. Replace it with a frame, a new sleeve or wrist, a shin connection, or a coach-taught guard-recovery route. MiddleEasy’s guard-retention guide explains how hip movement and frames carry that battle beyond the hands.
Passing grips should clear barriers before chasing the torso
The top player needs access around or through the legs. Grabbing the head too early can place weight forward while the guard player still controls sleeves, wrists, ankles, or distance with the feet. First clear the connection blocking your route. Then control the legs or hips long enough to move the body beyond them.
A pass is not complete because one grip succeeded. Once the legs are cleared, the top player must replace leg-oriented controls with upper-body control and settle the position. Grip fighting is a chain of connections, not one handle held from start to finish.
Gi grip fighting offers more handles and more rules
The gi creates friction and durable material connections. Collars can influence posture, sleeves can isolate arms, pants can help manage the legs, and the belt or lapel can support certain controls. Those options make early grip denial important: a strong cloth connection may persist even after the opponent starts moving.
Do not treat every piece of material as legal. Under the current rulebook linked by the International Brazilian Jiu-Jitsu Federation, placing fingers inside an opponent’s sleeve or pant opening is a serious foul. The same section prohibits grabbing inside the gi top or pants and routing a hand through the garment to hold its exterior. Event rules can change and other organizations differ, so confirm the current rules with the referee or coach.
Keep fingers together around the outside of the material and let the wrist stay close to neutral. A death grip with flared elbows spends energy and makes release slower. Use only enough tension to preserve the connection while the rest of the body performs the task.
No-gi replaces cloth with anatomical control
No-gi removes collars and sleeves, but not grip fighting. Wrist control, elbow control, two-on-ones, underhooks, overhooks, head position, and hip connections still determine who can turn, post, frame, or reach a leg. The controls often change more quickly because sweat and fitted clothing reduce friction.
A two-on-one illustrates the transferable idea. In the gi, two hands may control one sleeve or the sleeve-and-arm line. In no-gi, one hand can manage the wrist while the other controls above the elbow. The exact hand placement varies, but the advantage is the same: two of your connections temporarily organize one of the opponent’s arms, giving you a side to move toward.
Inside position is another bridge. An underhook places your arm under the opponent’s arm and connects higher around the torso. An overhook wraps over the arm and can block or redirect it. Neither is automatically superior; head position, hip position, and the surrounding position decide their value. MiddleEasy’s overhook guide gives that one connection a closer look.
Break a grip with structure, then act immediately
A reliable break is more than pulling your arm away. The opponent’s hand is connected to a forearm, elbow, shoulder, and stance. Your answer should change that alignment and bring stronger body mechanics against the gripping hand without attacking individual fingers.
- Stabilize the position. Protect posture, base, and the limb at risk before making a sudden movement.
- Control the gripping line. Use coach-approved hand placement around the wrist, hand, sleeve, or forearm. Never peel or bend one finger.
- Create an angle. Move the elbow, torso, feet, or hips so you are no longer pulling directly against the opponent’s strongest line.
- Use connected force. Let posture and body movement support the hands instead of yanking with one shoulder.
- Replace the connection. Recover stance, frame, establish your own grip, or move to the assigned position before the opponent reconnects.
The exact direction differs for a collar, sleeve, wrist, underhook, or pant grip. Learn one break for each common connection from your coach, then practice identifying which one is actually present. A memorized break applied to the wrong grip usually fails because its leverage is missing.
Seven mistakes waste energy or create risk
- Grabbing without a destination. Decide what the grip should move or deny before spending energy on it.
- Reaching with both hands. Losing posture and both defensive hands can offer the opponent easier access.
- Holding after the position changes. Release and replace a grip that no longer controls the relevant space.
- Pulling with the arms alone. Connect the grip to stance, head position, hips, and footwork.
- Accepting the first dominant grip. Clear or neutralize it before starting an unrelated technique.
- Using illegal or unsafe finger placement. Keep fingers outside gi openings and never bend individual digits.
- Turning every drill into a takedown round. Respect the assigned stopping point and reset before balance is lost.
Grip fatigue is useful feedback. If the forearms fail before the positional exchange develops, reduce squeezing and ask whether the connection has a job. Pain, numbness, swelling, or a joint forced beyond normal range is a stop signal, not a conditioning target.
Use a 20-minute beginner grip-fighting block
- Level and goal: beginner; recognize, deny, establish, clear, and replace common connections.
- Equipment: clean mat, normal gi for half the rounds, fitted no-gi clothing for the other half, timer, and qualified supervision.
- Duration: 20 minutes after the normal class warm-up.
- Work and rest: eight 90-second rounds with 60 seconds to reset, change roles, and name the connection.
- Intensity: 30 to 40 percent. No takedown finishes, submissions, finger peeling, neck cranks, or explosive grip breaks.
Rounds one and two begin standing in the gi. Player A wins by securing the coach-assigned collar-and-sleeve configuration with stable posture; Player B wins by preventing or safely clearing it. Stop before a throw. Rounds three and four begin from open guard in the gi: bottom establishes two useful connections, while top clears one and reaches the assigned passing checkpoint.
Rounds five and six repeat the standing task in no-gi using wrist, elbow, and inside-position control. Rounds seven and eight begin from open guard in no-gi: bottom manages the passer’s hands and distance; top clears the blocking connection and controls the leg line without completing a forceful pass.
Regression: begin with the desired grip already in place and let the defender perform the correct break with no resistance. Progression: start from neutral contact and allow each player to chain one replacement grip after the first clear. Place the block once or twice a week after technique instruction, not immediately before the hardest sparring session. Stop for pain, dizziness, panic, numbness, uncontrolled falling, tangled fingers, or a partner who cannot stay within the agreed intensity.
MiddleEasy’s beginner BJJ training principles can help place this focused work inside a broader first-year approach. The existing gi-versus-no-gi guide explains how clothing and pace affect the overall format.
Carry this checklist into the next round
- What positional problem should this grip solve?
- Which connection does the opponent need most, and can I deny it early?
- Are my feet, hips, head, and elbows supporting my hands?
- Do I need to clear the opponent’s grip before advancing?
- Has the position changed enough that I should release and replace?
- Are my fingers outside the gi openings and free from twisting?
The beginner’s advantage is not a bigger collection of grips. It is a repeatable decision: protect access, connect with a purpose, move the body behind the hands, advance to a stable position, and let go when the connection has finished its job. Ask your coach for one preferred gi sequence and one no-gi equivalent, then make the next light round about those two chains.